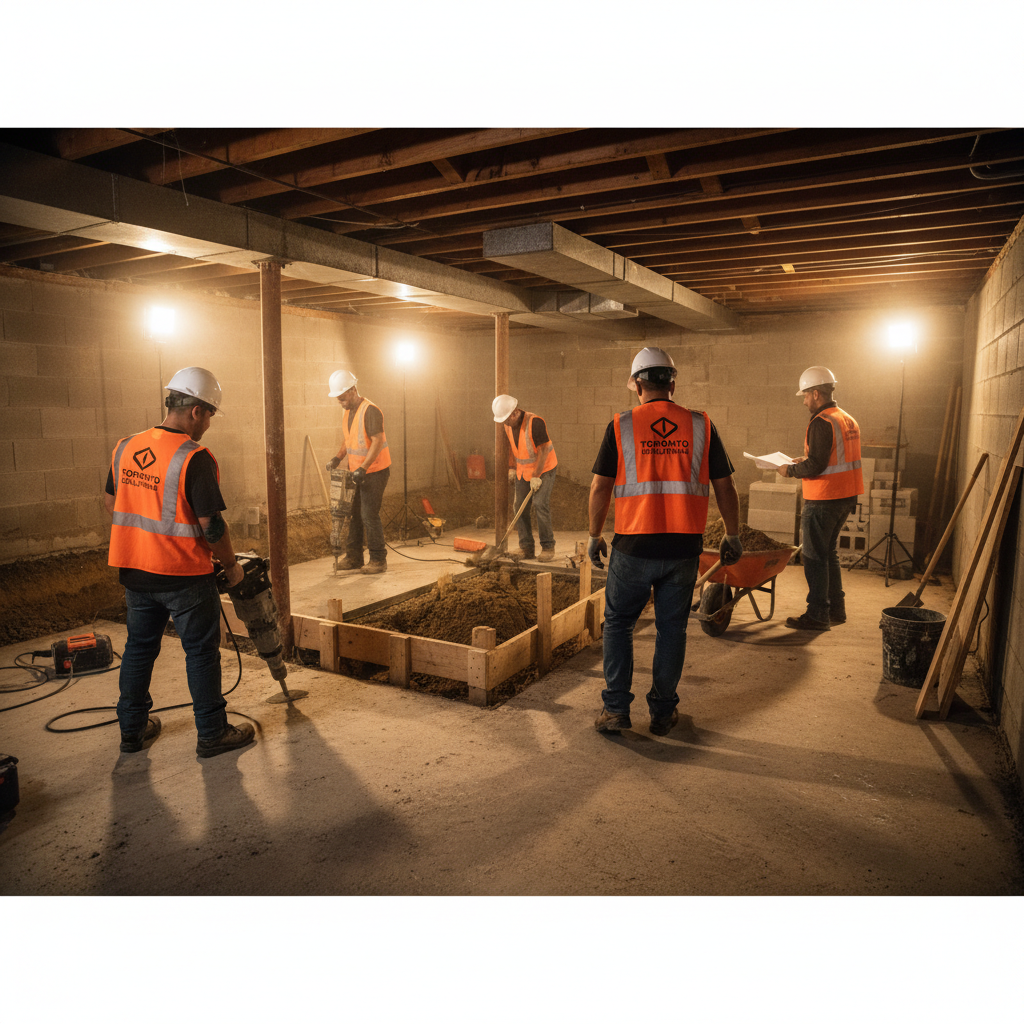
Completing the underpinning is a major milestone, but it is not the finish line. The freshly lowered basement floor you are looking at is a blank slab with nothing on it: no framing, no insulation, no electrical, no plumbing rough-in, and no ceiling. Turning that raw structural success into a finished, liveable space requires a carefully sequenced process that involves multiple trades, inspection hold points, and decisions that need to be made before you can move to the next stage.
This guide walks through the complete finishing sequence after underpinning is done, the timeline for each stage, what you need to decide at each step, and the total cost range for the finishing scope alone.
Why Sequence Matters More in a Post-Underpinning Basement
In a standard basement finishing project, the sequence matters because trades need to work in a specific order. After underpinning, sequence matters even more for two additional reasons.
First, the underpinning permit must be properly closed out before finishing work begins in many cases. Starting to frame before the structural permit is inspected and closed creates inspection complications that are difficult to unravel.
Second, decisions made at the design stage have a direct impact on what happens in the slab. If you want a bathroom in a specific location, the plumbing rough-in (floor drains, toilet rough-in, shower drain) must be placed before the new slab is poured. If you missed this window during the underpinning phase, adding a bathroom in a different location after the slab is poured means cutting into fresh concrete, which is expensive and disruptive.
Most experienced contractors will discuss the finishing layout with you during the underpinning design phase and coordinate placement of below-slab plumbing before the concrete is poured. If your contractor did not have this conversation with you, ask about it before the slab pour happens.
Stage 1: Permit Close-Out and Slab Cure
Timeline: 4 to 8 weeks after slab pour
After the underpinning concrete is poured and the slab is placed, two things must happen before finishing can begin.
First, the concrete must cure. OBC and structural engineering standards require a minimum 28-day cure period before imposing loads on new concrete. In practice, most contractors start framing 4 to 6 weeks after the pour to allow for both cure time and inspection scheduling.
Second, the structural permit must be inspected and either closed out or confirmed to be in the correct stage to proceed with finishing. The City of Toronto’s inspection system requires a final inspection on the structural scope. Confirm with your permit holder whether the underpinning permit covers finishing or whether a separate permit is required.
During this waiting period, this is the right time to finalize your finishing design: confirm room layout, ceiling height, bathroom location, any wet bar, and electrical requirements. Changes are free at the design stage and expensive after framing begins.
Stage 2: Waterproofing (If Not Already Done)
Timeline: 3 to 7 days
If interior waterproofing was not installed during the underpinning phase, this is the last opportunity to install it without disrupting a finished basement. The drainage channel installation requires saw-cutting along the perimeter of the slab, a task that creates significant dust and debris that is impossible to control around finished walls.
The strong recommendation from experienced contractors is always to complete waterproofing before framing begins. Doing waterproofing after framing means either cutting up your framing or working in a confined, finished space with power tools and concrete dust.
If waterproofing was already installed as part of the underpinning scope (the most cost-efficient approach), this stage is already done.
Stage 3: Rough Framing
Timeline: 3 to 7 days depending on basement size
Framing involves constructing the wood stud walls that define rooms, create closets, and provide a surface for insulation and drywall. In a post-underpinning basement, framing is done on the new slab and attached to the new concrete walls.
Key decisions at this stage:
- Room layout and partition walls
- Bathroom and laundry room locations
- Ceiling height (standard is 8’0” or higher after underpinning; confirm clearance at beams and ducts)
- Stair location and configuration
- Any structural beams that need boxing or soffit framing
Framing inspection is required before insulation is installed. Do not proceed to insulation until the framing inspection is passed.
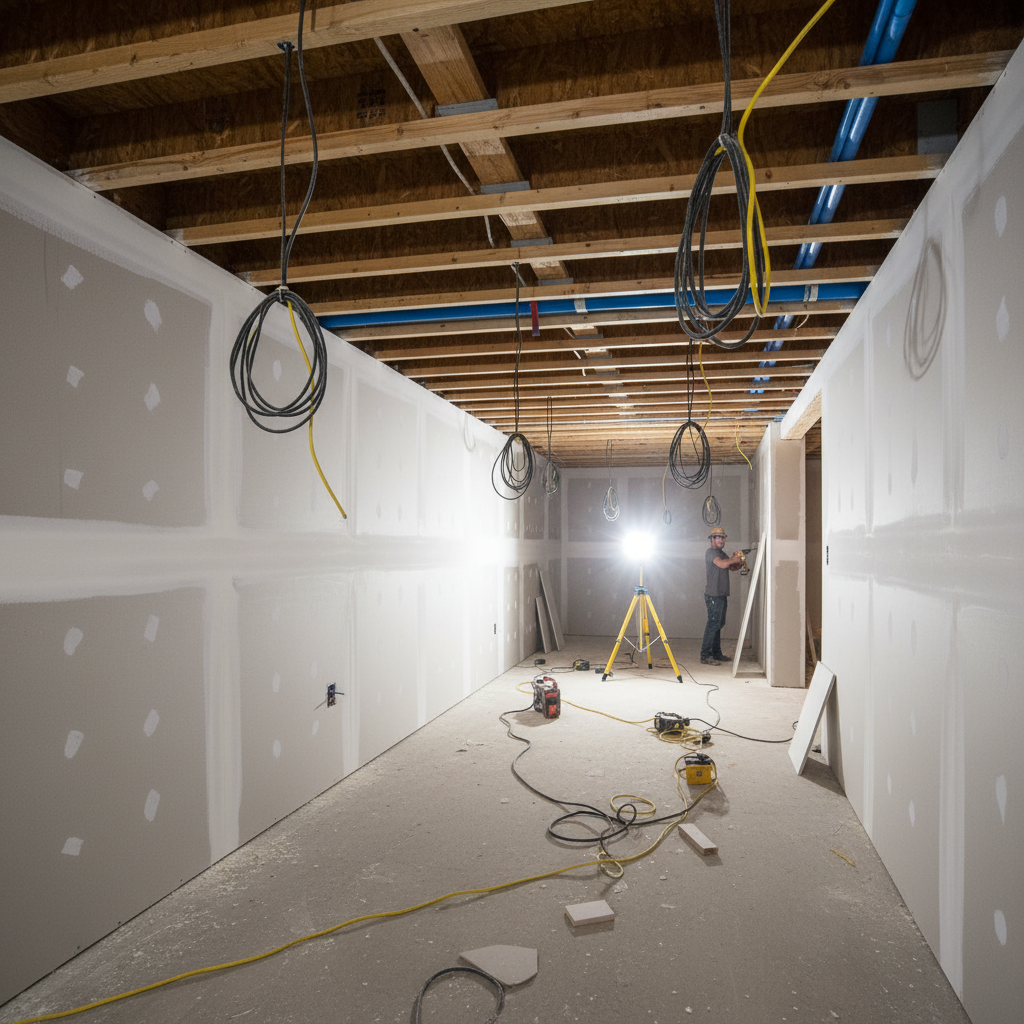
Stage 4: Rough Electrical
Timeline: 2 to 4 days
Rough electrical involves running wire through the framed walls and ceiling before insulation and drywall. This is where every outlet, light switch, ceiling box, panel circuits, and bathroom exhaust fan is wired in rough form.
The Electrical Safety Authority (ESA) requires an inspection of rough electrical before it is concealed behind drywall. Your electrician will schedule this inspection and be present for it.
Decisions at this stage:
- Number and location of outlets (OBC and ESA have minimum requirements; plan for more than the minimum)
- Lighting layout (pot lights, pendants, under-cabinet)
- Dedicated circuits for kitchen appliances, bathroom, laundry
- Panel upgrade requirement (older Toronto homes on 100-amp service may require an upgrade to support a finished basement)
Stage 5: Rough Plumbing
Timeline: 2 to 5 days
If above-slab plumbing is required (sink drains, toilet connections, shower drains not installed during underpinning), rough plumbing happens at this stage. Below-slab plumbing should already be installed; if not, slab cutting is required before framing proceeds.
Above-slab rough plumbing connects the below-slab stubs to their finished fixture heights and routes supply lines to bathroom and kitchen rough-in locations.
A plumbing permit and rough-in inspection are required before concealing pipes.
Stage 6: HVAC Rough-In
Timeline: 2 to 4 days
Heating, ventilation, and air conditioning work in the basement includes extending existing ductwork to serve new rooms, adding basement-specific supply and return registers, installing bathroom exhaust fans, and in some cases adding a heat recovery ventilator (HRV) or dedicated mini-split for the basement suite.
For secondary suites, OBC Section 9.36 requires that the suite have its own heat source controllable by the tenant. This typically means a dedicated zone on the forced-air system or a separate heat source.
Ductwork routing needs to be coordinated with framing layout before drywall, since ducts that were not accounted for in the framing design end up in soffits or dropped ceilings that consume ceiling height you worked hard to gain.
Stage 7: Insulation and Vapour Barrier
Timeline: 1 to 3 days
Basement walls in Ontario require insulation to meet OBC Section 9.36 thermal performance requirements. For below-grade walls, the preferred method is closed-cell spray foam or rigid foam (XPS) with a vapour barrier, since standard batt insulation in contact with a concrete wall holds moisture and grows mould.
The vapour barrier must be installed on the warm side of the insulation (toward the interior). An insulation inspection is required in some cases before drywall.
RSI value requirements vary by Toronto’s climate zone. Consult your permit drawings for the specified RSI value.
Stage 8: Drywall and Taping
Timeline: 5 to 10 days including taping and finishing coats
Drywall installation, taping, mudding, and sanding. For basement suites, fire-rated drywall (Type X) is required on the ceiling between the suite and the floor above. Confirm the required fire separation assembly with your permit drawings.
The drywall phase is dusty and requires proper containment from the rest of the house.
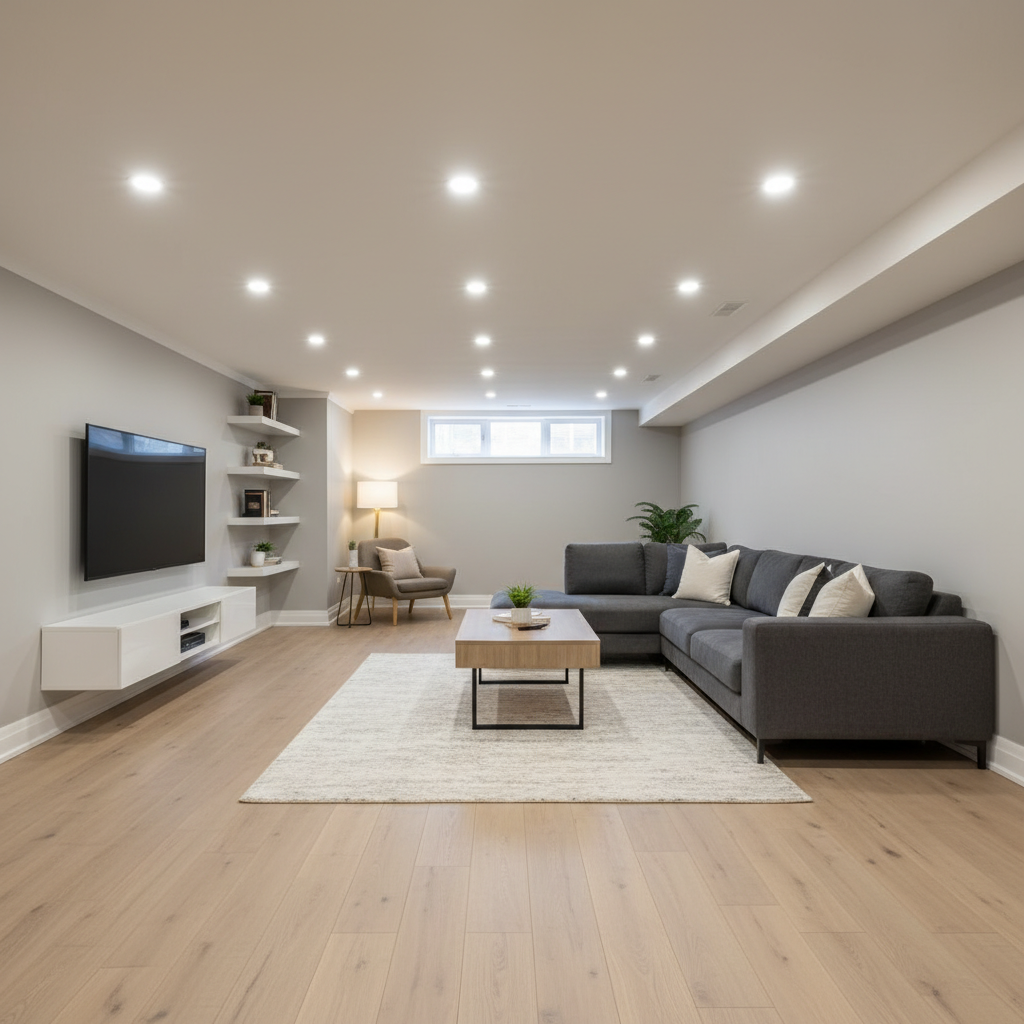
Stage 9: Flooring, Trim, and Finishes
Timeline: 3 to 10 days depending on scope
Flooring in a post-underpinning basement requires attention to moisture. Even with interior waterproofing installed, a basement is a below-grade environment. Appropriate flooring choices include:
- Luxury vinyl plank (LVP): most popular for moisture resistance
- Engineered hardwood: acceptable with appropriate underlayment
- Tile: excellent for moisture resistance, preferred for bathrooms and laundry rooms
- Carpet: not recommended directly on concrete; requires subfloor if used
Trim, doors, and paint complete the finishing phase.
Stage 10: Final Inspections
Timeline: 1 to 3 weeks (inspection scheduling dependent)
Final inspections required:
- Building permit final inspection (framing, insulation, fire separation)
- Electrical final inspection (ESA)
- Plumbing final inspection
All three must be passed and closed out before a secondary suite can be legally registered with the City of Toronto.
Cost Summary for Finishing After Underpinning
| Scope Level | Cost per Square Foot | Typical Total (1,000 sqft) |
|---|---|---|
| Basic (framing, drywall, lighting, one bath) | $50 to $80 | $50,000 to $80,000 |
| Mid-range (above plus quality finishes, kitchen) | $80 to $120 | $80,000 to $120,000 |
| High-end (custom details, full suite) | $120 to $200 | $120,000 to $200,000 |
These costs are for the finishing scope only and do not include the underpinning cost ($50,000 to $120,000 for the structural work).
Total Project Timeline Summary
| Phase | Duration |
|---|---|
| Underpinning construction | 3 to 8 weeks |
| Slab cure and permit close-out | 4 to 8 weeks |
| Waterproofing (if separate) | 3 to 7 days |
| Rough framing through drywall | 6 to 12 weeks |
| Finishes and flooring | 2 to 4 weeks |
| Final inspections | 1 to 3 weeks |
| Total from start of underpinning to move-in | 5 to 7 months |
For further context, read our guides on Basement Finishing Process and Timeline and Waterproofing During Underpinning.
Ready to start planning your finished basement? Talk to our team about the full sequence from underpinning through finishing and we will help you plan a project with no surprises.